Creating a New Store for a Multi-Store Environment
Perform the following steps to create a new KommerceServer store for a multi-store environment.
- Navigate to the Store Listing page by selecting Store Management>Stores. The Store Management Listing page opens.

- Click the New button. The Store Definition page opens.
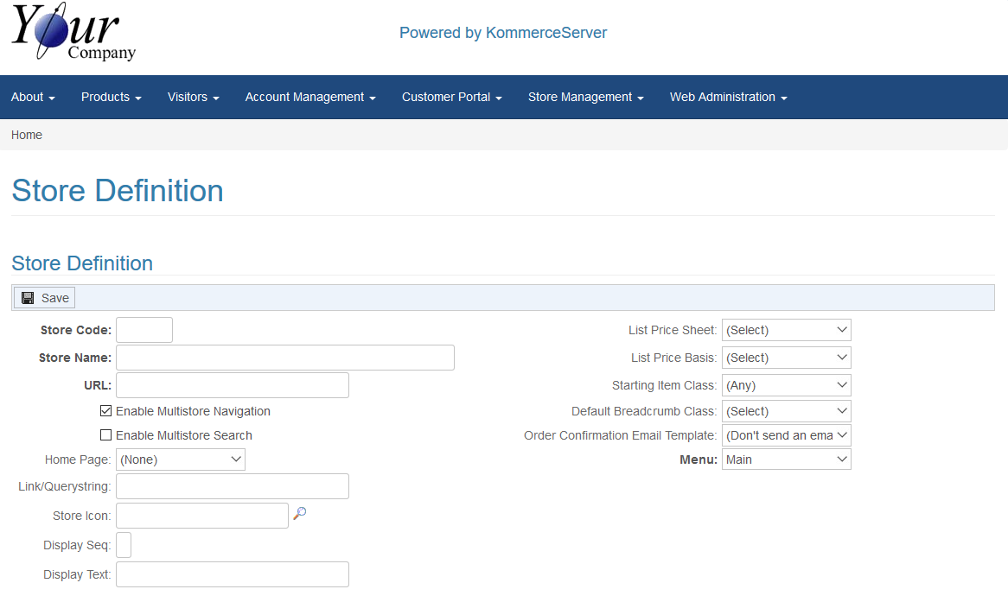
- Enter a unique identifier for your store in the Store Code field.
- Enter a name for your store in the Store Name field.
- Enter the URL for your store in the URL field.
- Select a previously defined home/landing page for your store in the Home Page drop-down menu.
- If you want to append your URL with a link or query string, you can do so in the Link/Querystring field.
- Click the search icon next to the Store Icon field in order to search for and select an icon for your store tab.
- Enter a number in the Display Seq field that denotes the order (from left to right) in which you want the store tab to appear on your Home page.
- Enter the text you want to display on your store tab in the Display Text field.
- Select the price sheet you want to use for your store in the List Price Sheet drop-down menu.
- Select a price basis from the List Price Basis drop-down menu.
- If you have already created item classes that you want to use for your store, you can select the item class that you want to use for your starting item class in the Starting Item Class drop-down menu.
- Select a breadcrumb class from the Default Breadcrumb Class drop-down menu.
- Select an order confirmation template you want to use for the store from the Order Confirmation Email Template drop-down menu. Click here to view more information on notification templates.
- Select a menu option from the Menu drop-down menu.
- Click the Save button to save your changes.